渐变
createLinearGradient
创建一个线性的渐变颜色。需要使用 addColorStop() 来指定渐变点,至少要两个。
参数(表8-76): 表8-76
| 参数 | 类型 | 定义 |
|---|---|---|
| x0 | Number | 起点的x坐标 |
| y0 | Number | 起点的y坐标 |
| x1 | Number | 终点的x坐标 |
| y1 | Number | 终点的y坐标 |
示例代码:
Page({
  onLoad: function () {
    const ctx = wx.createCanvasContext('myCanvas')
    // 创建线性渐变
    const grd = ctx.createLinearGradient(0, 0, 150, 80)
    grd.addColorStop(0, 'red')
    grd.addColorStop(1, 'white')
    // 使用创建好的渐变颜色填充矩形
    ctx.setFillStyle(grd)
    ctx.fillRect(10, 10, 150, 80)
    ctx.draw()
  },
})
运行结果(图8-20):
 图8-20 线性渐变效果示例图
在这个例子中,水平方向(x方向)与垂直方向(y方向)都添加了渐变,如果只想要一个方向,则另一个方向上两个数值都设置为0即可。例如如果改成ctx.createLinearGradient(0, 0, 150, 0)则只有水平方向有渐变效果。
图8-20 线性渐变效果示例图
在这个例子中,水平方向(x方向)与垂直方向(y方向)都添加了渐变,如果只想要一个方向,则另一个方向上两个数值都设置为0即可。例如如果改成ctx.createLinearGradient(0, 0, 150, 0)则只有水平方向有渐变效果。
createCircularGradient
创建一个圆形的渐变颜色。起点在圆心,终点在圆环。同样需要使用 addColorStop() 来指定渐变点,至少要两个。
参数(表8-77): 表8-77
| 参数 | 类型 | 定义 |
|---|---|---|
| x | Number | 圆心的x坐标 |
| y | Number | 圆心的y坐标 |
| r | Number | 圆的半径 |
示例代码:
Page({
  onLoad: function () {
    const ctx = wx.createCanvasContext('myCanvas')
    //创建圆形渐变
    const grd = ctx.createCircularGradient(75, 50, 50)
    grd.addColorStop(0, 'red')
    grd.addColorStop(1, 'white')
    //使用渐变填充
    ctx.setFillStyle(grd)
    ctx.fillRect(10, 10, 150, 80)
    ctx.draw()
  },
})
运行结果(图8-21):
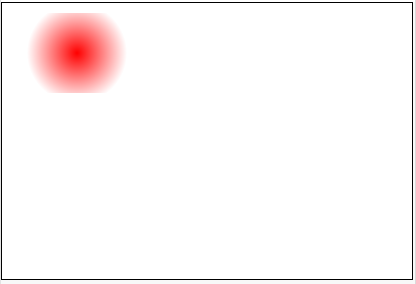 图8-21 圆形渐变示例图
addColorStop
创建一个颜色的渐变点。小于最小 stop 的部分会按最小stop的color来渲染,大于最大stop的部分会按最大stop的color来渲染。
参数(表8-78): 表8-78
| 参数 | 类型 | 定义 |
|---|---|---|
| stop | Number(0-1) | 表示渐变点在起点和终点中的位置 |
| color | Color | 渐变点的颜色 |
示例代码:
Page({
  onLoad: function () {
    const ctx = wx.createCanvasContext('myCanvas')
    // 创建线性渐变
    const grd = ctx.createLinearGradient(0, 0, 150, 80)
    grd.addColorStop(0, 'red')
    grd.addColorStop(0.16, 'orange')
    grd.addColorStop(0.33, 'yellow')
    grd.addColorStop(0.5, 'green')
    grd.addColorStop(0.66, 'cyan')
    grd.addColorStop(0.83, 'blue')
    grd.addColorStop(1, 'purple')
    // 使用创建好的渐变颜色填充矩形
    ctx.setFillStyle(grd)
    ctx.fillRect(10, 10, 150, 80)
    ctx.draw()
  },
})